Greetings to puzzle lovers! Experience the joy of conquering intricate jigsaw puzzles and preserving your triumphs. Uncover the secrets of how to tape a jigsaw puzzle in this all-encompassing guide. We’ll cover essential tools and a detailed step-by-step process, ensuring each piece endures. Join us on a journey to immortalize your completed puzzles for a lifetime of enjoyment.
Why Tape a Jigsaw Puzzle?
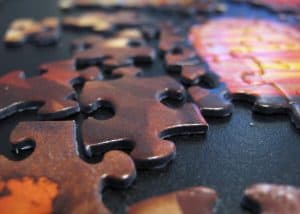
Before we delve into the how-tos, let’s explore the why. Picture this: You’ve spent hours carefully assembling a beautiful jigsaw puzzle, only to have it crumble when moved or displayed. Heartbreaking, right? Taping your puzzle is the secret weapon against such mishaps, preserving your masterpiece for years to come. Whether you plan to frame it, gift it, or simply admire it on your wall, the process of taping ensures that every piece stays in its place, and your hard work doesn’t go to waste.
Materials You’ll Need
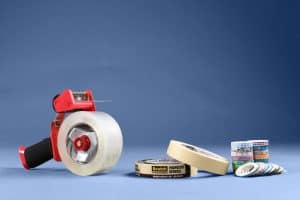
To embark on this journey, gather the following materials: clear packing tape, foam board, poster board, adhesive sheets, wax paper, and a rolling pin. These essentials will provide the sturdy foundation required for a successful taping endeavor. The type of puzzle you’ve completed might influence your material choice, so keep the size and weight of your puzzle in mind.
Choosing the Right Tape
Not all tapes are created equal, and choosing the right one is crucial. Clear packing tape is a popular choice, offering a seamless finish without obstructing your puzzle’s aesthetics. Ensure that the tape is sturdy but not too thick, striking the right balance between durability and subtlety. This step is vital for achieving a polished look and long-lasting results.
Preparing Your Workspace
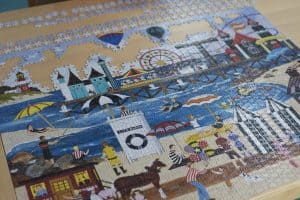
Before diving into the taping process, set the stage for success. Choose a flat and clean surface, providing enough space to spread out your puzzle without feeling cramped. A clutter-free environment minimizes the risk of mistakes and ensures a smooth taping experience. Think of it as creating a dedicated art studio for your puzzle preservation project.
Taping Process
Now, let’s get hands-on with the taping process. Lay out your puzzle on a clean, flat surface. Using clear packing tape, carefully flip the puzzle to expose the back. Begin taping from the center outwards, ensuring each piece is secured. Trim any excess tape, paying attention to corners and edges. To achieve a flawless finish, use a rolling pin to press the tape firmly onto the puzzle surface. This step not only prevents air bubbles but also guarantees a bond that withstands the test of time.
Common Mistakes to Avoid
Mistakes happen, but we’re here to help you sidestep common pitfalls. Avoid using tape that’s too thick, as it can create uneven surfaces. Ensure the puzzle is entirely flat before taping to prevent wrinkles. If you encounter bubbles during the taping process, carefully lift the tape and reapply, smoothing out any imperfections. Taking these precautions will result in a seamlessly preserved puzzle.
Alternative Methods
While taping is a popular method, consider alternative approaches such as puzzle glue, adhesive sheets, or even framing. Each method has its pros and cons, so weigh your options based on the size and type of puzzle you’ve completed. Experimenting with different techniques allows you to find the perfect preservation method for your unique puzzle.
Framing Your Completed Masterpiece
Now that your jigsaw puzzle is securely taped and preserved, let’s explore the exciting world of framing. Choosing the right frame is like putting the final piece into a puzzle— it completes the picture. Opt for a frame that not only complements the colors and theme of your puzzle but also enhances its overall aesthetic. Consider a shadow box for a three-dimensional effect, showcasing the depth of your completed masterpiece. When framing, ensure that the puzzle board provides a stable backing, offering both support and protection to your carefully assembled creation. It’s not just about preserving; it’s about turning your completed puzzle into a work of art that you can proudly display.
Embrace the joy of framing; it’s the grand finale to your puzzling journey. The process of framing goes beyond mere preservation; it elevates your completed puzzle to a statement piece in your home. So, go ahead, explore different framing options, and let your framed puzzle become a conversation starter, a testament to the dedication and passion you poured into each piece.
Adding a Personal Touch with Mod Podge
While taping ensures the structural integrity of your puzzle, Mod Podge can add that extra layer of finesse and protection. Applying Mod Podge evenly over the front surface of your completed puzzle creates a glossy finish, enhancing the vibrancy of colors and providing a protective seal. It’s not just about gluing; it’s about elevating your puzzle to a whole new level. The process is straightforward—spread the Mod Podge evenly using a foam brush, allowing it to dry completely. This method not only secures the puzzle pieces but also adds a touch of sophistication to your finished puzzle.
Discover the joy of Mod Podge; it’s the finishing touch that transforms your completed puzzle into a true work of art. As you evenly spread this adhesive, envision the glossy sheen that will bring out the details in every piece. Mod Podge isn’t just glue; it’s a creative tool that allows you to showcase your great puzzles in a way that reflects the effort and passion you put into each one. So, have fun with it and let your completed puzzle shine with a touch of Mod Podge magic.
Tips for Framing
If framing is in your plans, we’ve got you covered. Opt for a sturdy frame that complements your puzzle’s aesthetics. Ensure the puzzle is centered within the frame, and use puzzle glue sheets or adhesive to secure it in place. Framing not only showcases your completed masterpiece but also provides protection against dust and potential damage.
Final Thoughts: How to Tape a Jigsaw Puzzle
And there you have it – a foolproof guide on how to tape a jigsaw puzzle, unlocking the secret to preserving your hard work for years to come. Whether you choose clear packing tape, adhesive sheets, or opt for alternative methods, the key is to approach the process with patience and precision. Now, go ahead, tape those puzzles, and let your completed masterpieces take center stage in your home.